After completing this lesson, you'll be able to:
In previous exercises, you worked with the community mapping dataset, which the planning department uses for various community mapping tasks.
However, as time has passed, this dataset has become outdated. The planning department, therefore, wants to start building a new community mapping dataset. The dataset will have new data but use the existing schema where possible. They also – to use an open standard – want a format change to GML.
The department has identified two source datasets as required in the new community mapping "database." They are fire halls (source format: GML) and city parks (source format: MapInfo TAB). There was already parks data in the community map, but this new dataset consists of polygon geometry, not point. The fire halls data is entirely new for the community map.
So, let's create a new workspace to generate this new dataset.
Start by generating a workspace as follows:
| Reader Format | OGC GML (Geography Markup Language) |
| Reader Dataset | https://s3.amazonaws.com/FMEData/FMEData/Data/Emergency/FireHalls.gml or C:\FMEData\Data\Emergency\FireHalls.gml |
| Writer Format | OGC GML (Geography Markup Language) |
| Writer Dataset | C:\FMEData\Output\Training\NewCommunityMap.gml |
| Workflow Options | Dynamic Schema |
We chose the dynamic option so we can define our writer schema using a different dataset than the one we are reading.
So far, so good. Now let's add a reader for the new parks data by selecting Readers > Add Reader and using the following details:
| Reader Format | MapInfo TAB (MITAB) |
| Reader Dataset | https://s3.amazonaws.com/FMEData/FMEData/Data/Parks.zip or C:\FMEData\Data\Parks\Parks.tab |
| Workflow Options | Single Merged Feature Type |
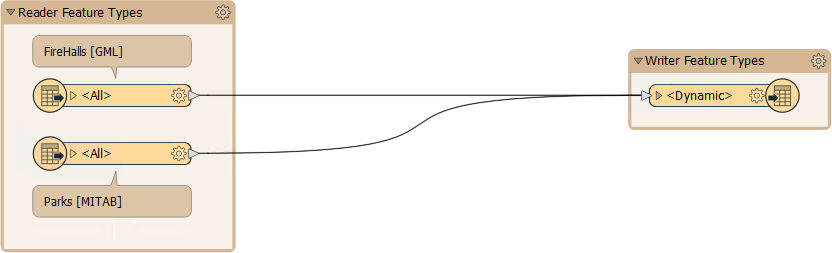
Connect the new reader feature type up to the existing writer feature type, and add an annotation for the reader feature types for easier recognition:
Ensure caching is on and run the workspace. This step will load up the source dataset caches. Inspect the two source datasets in Visual Preview to become familiar with them.
One of the requirements is to use the existing community mapping schema where possible. With the fire halls, this isn't possible since that data never existed in the original CommunityMapping Geodatabase. However, the parks dataset did exist in that Geodatabase, so we'll need to use that schema.
So, select Readers > Add Reader as Resource and, when prompted, enter the following details:
| Reader Format | Esri Geodatabase (File Geodb Open API) |
| Reader Dataset | https://s3.amazonaws.com/FMEData/FMEData/Data/CommunityMapping/CommunityMap.gdb.zip or C:\FMEData\Data\CommunityMapping\CommunityMap.gdb |
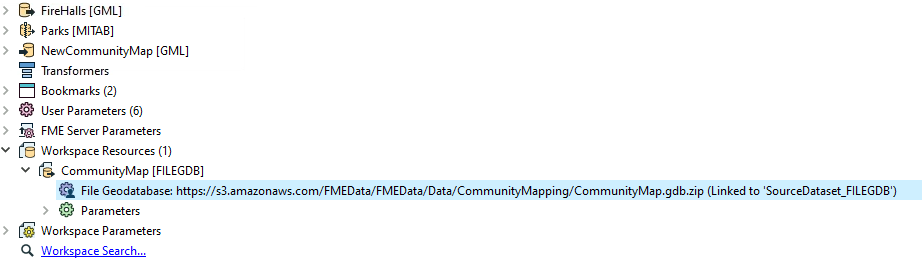
Click OK, and the Navigator shows the reader as a Resource:
Now we need to ensure that the writer feature type uses the resource schema.
Inspect the properties for the writer feature type. Click the Schema Sources browse button. Put a checkmark against CommunityMap. Ensure you have not checked Parks but have checked FireHalls:

Inspect the other dynamic parameters. Since we are writing both points and polygons, we might have to change a Geometry setting for some formats. But since GML can cope with both geometry types, we won't have to take any action; there will not even be a parameter for geometry type! Accept the parameter changes to close the dialog.
Save the workspace and then use Run > Rerun Entire Workspace.
Inspect the output. There should be two layers: one for fire halls and the other for parks. The parks dataset should have the schema from the CommunityMapping Geodatabase (not the MapInfo TAB Parks dataset), including attributes for ParkName, ParkAddress, and ParkURL (even if there is no data to fill some fields yet):
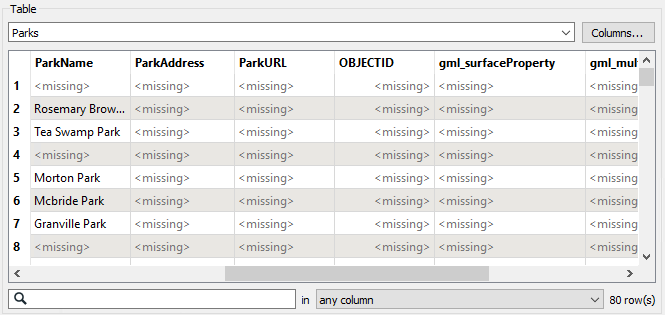
Notice that it also has OBJECTID, which came from the Geodatabase, and we don't need it.
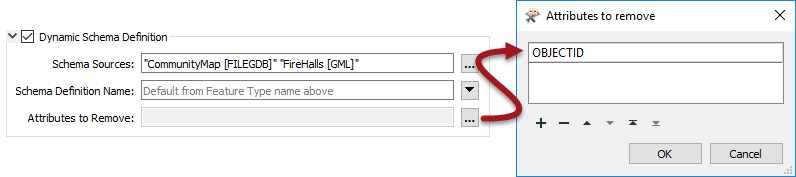
Revisit the writer feature type parameters. Click the button for Attributes to Remove and type OBJECTID into the first row of the dialog that opens. You won't be able to select it from the drop-down list because it comes from a resource reader, not a real reader:
Click OK to close this dialog, but don't close the feature type dialog yet.
A last-minute request is to add an attribute – LastUpdatedBy – to all tables in the output.
So, click on the User Attributes tab and add this new attribute. Make it a 30-character string.
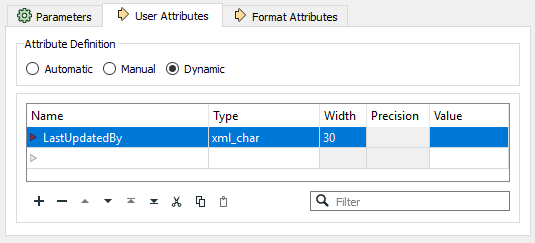
As you can see, there is no need to change the attribute definition mode - it should stay as dynamic.
Save the workspace and rerun it.
Inspect the output. Notice that OBJECTID will not appear as an attribute. LastUpdatedBy does appear - on both Parks and Firehalls - albeit that it doesn't have a value yet. We'll fix that problem in a later exercise.
